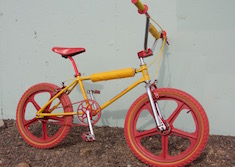
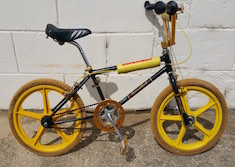
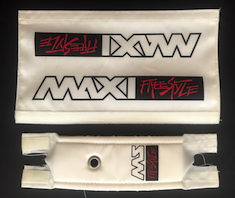
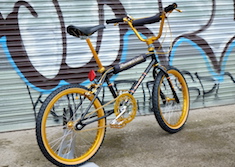
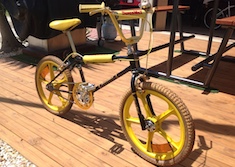
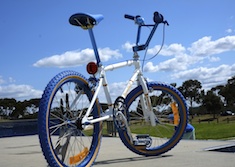
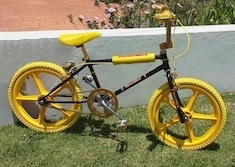
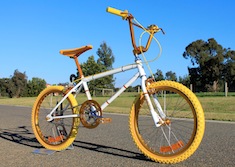
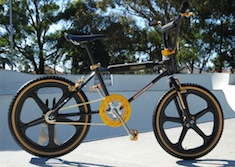
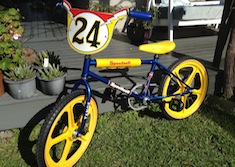
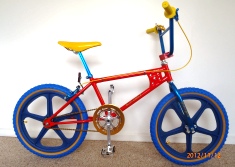
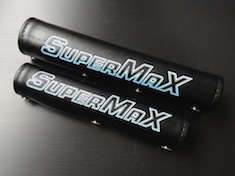
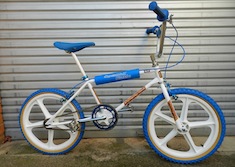
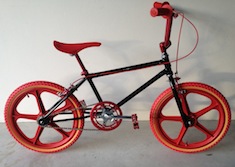
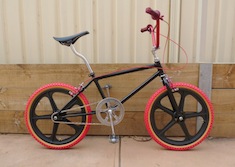
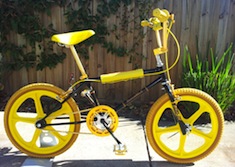
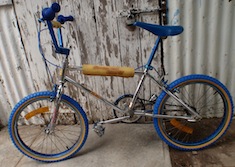
Malvern Star SuperMax, Maxi and Speedwell Sting
While researching information for my '81 SuperMax, '83 Speedwell Sting and up-coming '79 5-Hole gusset builds, I got so sick of finding information then losing it again that I started copying images of bikes, parts and advertising material into a single place. To assist others, I have reproduced this information over the following pages .. most of the information can be found on OzBMX and BMXMuseum and I am not pretending that this informtion will replace either of these valuable resources.
Please browse through all of the material I have collected:
|
If you have any Malvern Star or Speedwell information or photos, please forward them to me and I will add them to the site. I am especially interested in brochures and advertisements as these are most valuable when restoring bikes back to their original glory.
Restorations
- Zuno555: Series II Malvern Star Maxi
- Filmote: 5 Hole SuperMax
- OzBMXBandit: Series II SuperMax BMX Bandits Replica
Filmote: Restoration of a 5 Hole SuperMax
I wish that I had taken detailed before and after photos on my other builds as both a reminder to myself and as proof to skeptics that the bikes really were basket-cases before I restored them. With the restoration of this 5-Hole SuperMax I plan to document every aspect of its restoration in excruciating detail!
- Before
- Rims
- Handlebars
- Hubs
- Lacing the Wheels
- Truing the Wheels
- Assembly
- Complete
- Knox Show and Shine
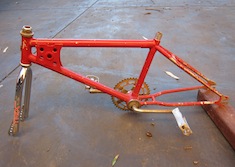
Before
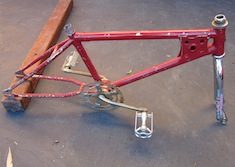
I purchased this SuperMax from Retro Rider (Josh) a couple of year ago and it has been sitting in my garage while I concentrated on the restoration of a Redline 400c and an '82 Team Hotfoot. In the meantime, I have collected a set of NOS Takagi Tourney cranks, Shimano Tourney calipers, Shimano DX levers and numerous other parts in anticipation.
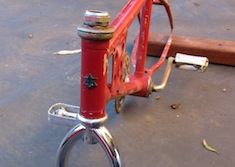
This example was in reasonable condition with minimal rust on the frame or forks where the paint or chrome had been knocked off. The forks are Tange TRX and will be date stamped allowing me to estimate the bike's overall age to within a couple of months. As the forks are in such good condition, I will have them rechromed rather than powdered.
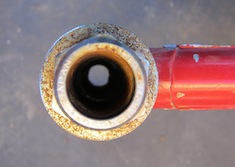
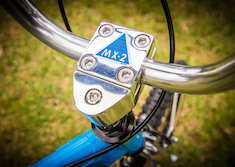
The head set is a nice Tange MX2 which has a little rust but the unit is still restorable. I will throughly inspect it when the bike is disassembled - if the inner bearing races of the top and bottom cups are badly pitted I might resort to polishing the lock nut and substituting the body of a newer unit.
|
|
|
|
|
Rims
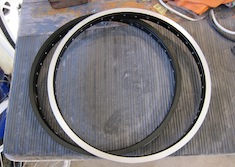
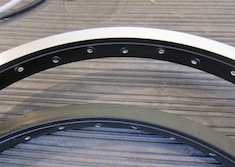
In keeping with the combination of black and chrome accessories, I decided to shiny-side a set of black Araya copy rims rather than keeping them all-black. If nothing else, I wanted to do something different to the rims I used on a previous build of a Series II SuperMax where I left the rims black.
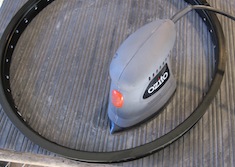
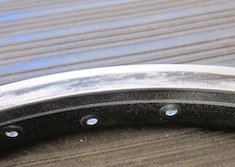
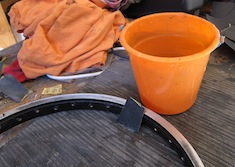
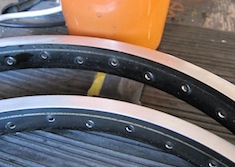
Shiny-siding rims is a simple if not boring task, especially on rims that have a sharp edge between the side walls and the centre section such as Araya 7X or copy rims. The first step is to use an electric sander to remove the bulk of the annodising by simply running the sander around the side walls ensuring the sander remains perpendicular to the face and does not damage the annodising on the centre section. This is much heasier than it sounds as the natural shape of the rims makes it almost impossible to slip. You will notice that the end result is quite rough but this will be addressed by hand sanding.
After the electric sanding is complete, the real fun starts. Starting with 80 or 100 grit Wet and Dry paper and slowly working up to 1200 grit, I sanded the sides ensuring that I didn't mark the center area of the rims. Liberal amounts of water helps the process and a rubber mat stops the rims from slipping and scratching the finished rim when you flip it over and start the other side.
Once complete, the rims should have a mirror finish just from sanding. You could polish the rims at this point using an electric polisher or by hand - especially if the rims are for a carpet queen - but your efforts will be wasted if you plan to ride the bike!
|
|
|
|
|
|
|
|
Handlebars
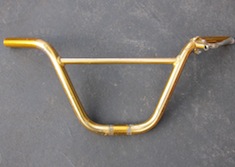
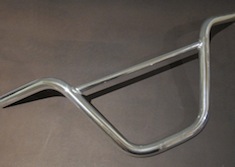
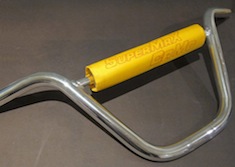
I purchased these alloy Win ALPs handlebars from BMXMadMan (Pete)and they were in a sorry state but being alloy I knew I could restore them easily to their former glory! Like shiny-siding the rims, this is a laborious task that I actually performed inside and in front of the television.
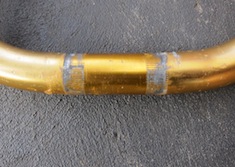
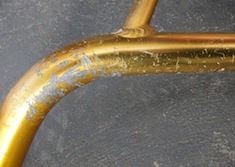
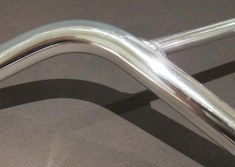
Using a bath of caustic soda (drain cleaner to you and me), I stripped as much of the annodising of the bars as possible to reduce the amount of hand sanding required. Caustic soda will damage the alloy if it is left in the solution too long. Mix the solution as per the instructions and closely monitor the progress of the caustic soda on the annodisation ensuring that the item is removed as soon as the bulk of it is gone. I used a tootbrush to work the solution into the areas around the welds and overall it took about 10 minutes for the process to complete. Wash the parts thoroughly with water when finished.
Again, starting with 80 or 100 grit Wet and Dry paper and slowly working up to 1200 grit, I sanded the bars while paying extra attention to the areas where the alloy had been damaged by the stem and brake levers from its previous life. A mirror finish can be achieved using just Wet and Dry but a polish with Autosol will gring up a beautiful shine.
|
|
|
|
|
|
|
|
Hubs
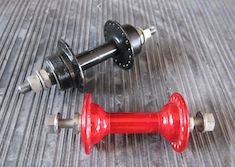
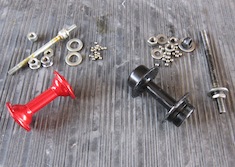
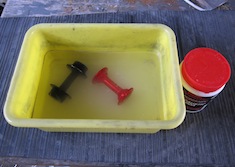
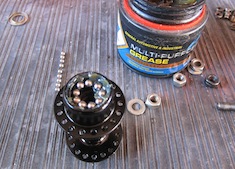
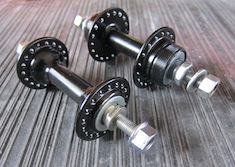
I started with two different hubs - an anodised Shimano low flange front hub and a steel no-name rear hub - that were in good condition. The Shimano hub had been laced previously and the spoke holes showed signs of use with spoke marks. I disassembled them carefully making sure that I didn't lose any of the ball-bearings and put these into plastic bags for later. I then gave the parts a thorough clean in a caustic soda solution before sanding the lacing and storage marks using Wet and Dry sandpaper.
At this point, check to make sure that the ball bearings are not visibly damaged and replace them if necessary. If reusing the old ball bearings, wash them and the retaining plate in petrol or some other solvent to remove the old grease. If the hubs are thirty years old like mine, the grease will have solidified and be hard to remove with just a cloth.
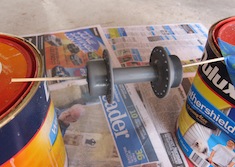
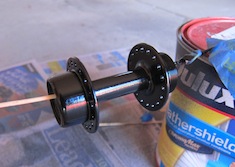
To protect the raw finish, I applied a coat of etch primer before two top-coats of black paint. I was not overly happy with the end result as the hubs ended up with a light orange peel finish (which looks worse in the photos than real life) even though I had given the hubs a quick rub down between coats with 2400 grit Wet and Dry. Orange peel can occur for many reasons - the quality of the paint, the size of the paint droplets in the spray mist and / or the lack of talent of the applicator (me!).
When reassembling the hubs, place a large dollop of grease in the bearing race and smear around it to coat the entire race. Place the ball bearings one by one into the grease and seat them in the race by pushing them down with a toothpick or some other non-metal pointer - the grease will hold them in place. Once all are seated correctly, insert the axle and screw the bearing retainer and its lock nut into place. Tighten them by hand to the point that you cannot spin the hub then release them until you can spin the hub freely.
|
|
|
|
|
|
|
|
|
|
Lacing the Wheels
Despite what people say, lacing a BMX wheel is really simple and what I have documented below was my first attempt. Unlike wheels for a geared bike where the rim is laced off-centre to the hub using different length spokes on opposite sides of the wheel, BMX wheels have equal length spokes which makes both the lacing and truing process simple.
There are many sites on the web that provide calculations to determine the right spoke length based on dimensions taken from the hubs and rims. A better way is to look at Benny's Spoke Helper thread on OzBMX and see if your combination of rims and wheels are there. If not, post your details of your combination and Benny or others will respond with lengths based on experience. Shimano low flange front hubs laced to Araya 7X rims required 188mm spokes and the rears require about 184mm. I had a full set of 188mm spokes handy and will show you how over-length spokes can be used if they are only four or five millimetres too long.
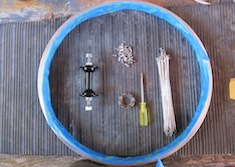
Lacing a rim requires only two tools - a spoke tightener and a screwdriver. The spoke tightener can be bought at any bike shop and come in a variety of styles. The one pictured allows you to tighten spokes ranging in size from 10g to 16g and is ideal to have for the ongoing adjustment of different sized wheels. When building a wheel it is a little annoying as invariably you find that you have rotated it when moving from spoke to spoke and that you are trying to adjust a spoke with the wrong size hole. As every bike I have has 14g spokes, I wish now that I had bought a single size unit.
Before you start
Firstly, you will notice that the spoke holes in the rim are alternate from left to right. Spokes from the left hand side of the hub will only go to holes in the left hand side of the rim and visa versa. To protect the face of the hub from scratching, I have taped them using a low adhesive masking tape made by 3M.
The spokes on a rim go in two directions and are known as trailing and leading spokes.
- "Trailing" spokes. In a rear wheel, the trailing spokes are those which become tighter when the rider applies pressure to the pedals. They are called "trailing" because they point backward from the direction the hub is turned in.
- Leading" spokes. These are the spokes that exit the hub in the direction of rotation.
The instructions below are for lacing wheels using a '3 cross' pattern which is the most common pattern and is a great compromise between easy of construction (less spoke bending) and wheel rigidity. Three cross means that each spoke crosses three other spokes on the same side of the hub. There are numerous sites on the web describing other patterns - 2 cross, 4 cross and some novelty patterns.
Step 1
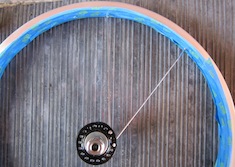
We will start with the rear hub and insert the trailing spokes first. Place a spoke into the free-wheel side of the hub from the outside of the hub, so that the head of the spoke is on the outside edge of the hub. This spoke will then go to the 1st corresponding spoke hole to the right of the valve hole. Screw a nipple on to the spoke to hold it in place - I screwed the nipples on half a dozen turns each and try to keep it consistent across the entire build as it makes it a little easier later when truing the wheel.
|
|
|
| Figure 1: The tools required - a spoke wrench and screwdriver. |
Figure 2: After inserting two trailing spokes on the free-wheel side. |
Step 2
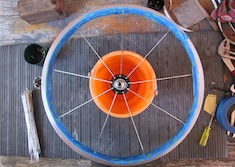
Insert another spoke 2 holes clockwise from the first, leaving a single empty hole between them. This spoke will go to the hole on the rim that is 4 holes away from the last spoke, so there are 3 empty holes between them on the rim. Repeat this for every other hole on this side of the hub. When complete, the wheel should look like Figure 3.
Step 3
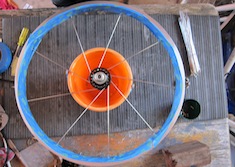
Twist the hub clockwise so that it looks like figure 4.
|
|
|
| Figure 3: Wheel with all trailing spokes on the free-wheel side fitted. |
Figure 4: Wheel after twisting the hub clockwise and turning over. |
Step 4
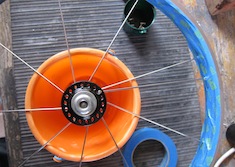
Turn the wheel over and begin to lace the remainder of the trailing spokes. You will notice that the holes on either side of the hub do not line up - they are staggered slightly. The next step is to insert a spoke in this side of the hub so that it sits in front of the spoke on the opposite side of the hub (looking directly down on the wheel from above) as seen in Figure 5. This spoke is inserted from the outside of the hub so the head of the spoke is on the outside edge of the hub (the same as Step 1).
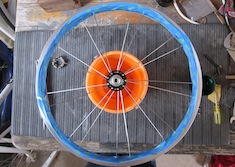
This spoke will then go to the corresponding hole on this side of the rim, in front of the spoke that is already in place from Steps 1 - 3. Once this spoke is in place, complete the process to fit the remainder of the trailing spokes. At this stage the wheel will have all 18 trailing spokes in place. In the rim there will be 2 spokes, 2 empty holes, 2 spokes, 2 holes and so on .. as seen in Figure 6.
|
|
|
| Figure 5: 1st trailing spoke, other side. | Figure 6: All trailing spokes completed both sides. |
Step 5
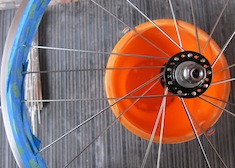
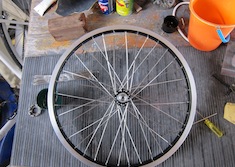
Now we will insert the leading spokes. Turn the wheel back over so the free wheel side is toward you. Twist the hub clockwise as far as it will go (as Step 3). Insert a spoke into any hole, but this time from the inside of the hub, so the head of the spoke is on the inside edge of the hub. As mentioned, we are lacing the wheels using a 3 cross pattern therefore the leading spoke will cross over 3 trailing spokes - the first two crosses will pass on the outside of the trailing spokes, but for the third cross it will go inside of the spokes. Refer Figure 7.
You will have to bend this final leading spoke to get it around the 3rd cross and into the hole on the rim. Ensure that you match the spoke to a hole on the side of the rim that corresponds to the side of the hub you are working on. Complete the process on both sides of the hub to complete the wheel.
|
|
|
| Figure 7: The spoke goes over two spokes sides.and under the third. |
Figure 8: The complete wheel. |
Step 6
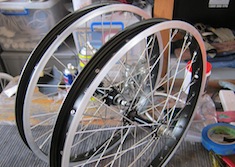
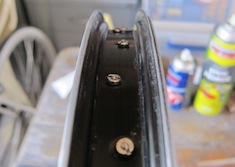
I used 188mm spokes for both front and rear rims even though the higher flange on the rear called for a shorter spoke. As a result the head of the spoke has protruded beyond the top of the nipple as shown in Figure 10. Once the truing of the wheel is complete, the thread of the spoke must be filed flat against the nipple to prevent it from popping the tube. Using longer spokes is only possible if it is a few millimetres too long otherwise the nipples will bind against the end of thread preventing proper tensioning during the truing phase.
|
|
|
| Figure 9: The complete set, front and back. | Figure 10: Over-length spokes protruding through the top of the nipple. |
Truing the Wheels
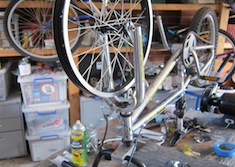
Like the lacing process, truing a wheel is supposed to be hard but is really quite easy once you get the hang of it. I didn't have access to a professional wheel truing stand so I simply used the forks from my rider Mongoose - when truing the rear wheel I removed the bearing retaining nuts and splayed the forks by hand to allow the wider hubs to fit.
Start by ensuring all spokes on the wheel are tighten to the same tension. There are tools that will assist in determining a spoke's tension but a good gauge is to tighten all of the spokes to a known point, for example to a point where the thread is no longer visible beneath the nipple. I then tightened each spoke a half a turn, starting with the spoke on one side of the valve hole and then working systematically around the entire wheel. You will feel how hard it is to tighten the spokes - if they are still loose, repeat the tightening procedure uniformly around the wheel until the spokes feel tight.
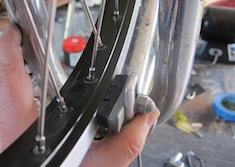
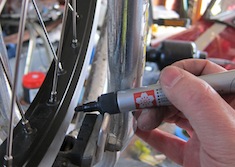
Using the brake pad or a white-board marker as a guide, spin the wheel and identify that areas of the rim that touch the pad or pen. Tighten the spokes on that side of the rim and at the centre of the identified section and slowly work your away from the centre whilst adjusting the tension a little less with each spoke. If you feel the spokes are getting too hard to adjust, loosen the spokes on the opposite side of the hub. Complete this procedure until you are happy that the rims are straight .. simple!
|
|
|
|
Assembly
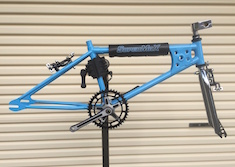
I put this project on the back burner in favour of building a couple of Hotfeet but now I want to complete this bike so I can take it to the Hurstbridge show in August. Assembly is really easy when you are using NOS parts with fresh hardware and fixtures.
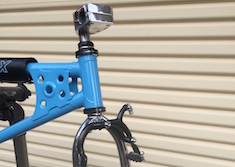
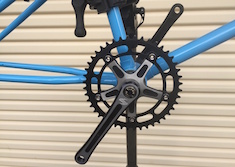
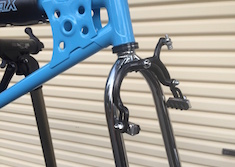
I was a little concerned about the colour scheme I had chosen but its beginning to grow on me. I was inspired when I saw haro_boy's PK Ripper which has basically the same colour scheme (here). The paint was done by Pete and the pads by Steve at EsemDesign.
|
|
|

|
|
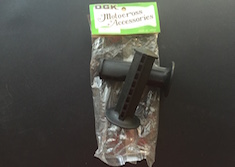
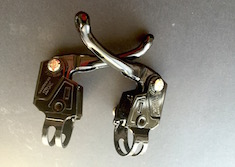
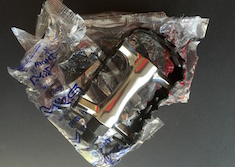
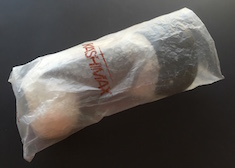
More NOS parts I have been collecting for the last year and a half and had to hunt around through cupboards and boxes to find everything. Was pretty excited when I started uncovering things - a Kashimax seat, NOS Shimano Tourney callipers, NOS DX levers and some MKS pedals. Couldn't remember if the pedals were BM-7s or BM-10s and noe of the pics on the internet looked like the ones I had. Oh well, I will take some pics for the site anyhow and work it out later. Hang on, they are VPs! I had put them in the MKS plastic to prevent them from getting damaged. Major disappointment ..
|
|
|

|
|
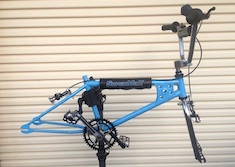
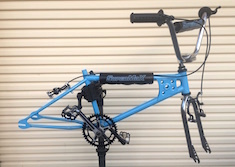
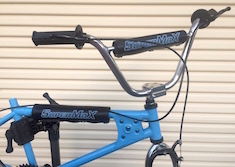
Add some more bits from my collection of parts and its really taking shape. I have decided that the wheels that I built for this bike are not up to the standard of the rest of the bike so I have spoken to Benny about a set of mint Ukais with Suzue hubs to finish the bike off. In addition to the wheels, all it needs is a seat post and seat clamp .. The hunt for a clean Tange or Suntour clamp begins!
|
|
|

|

|
Complete
I entered this bike into the Melburn Custom Bicycle Show before it was complete and before the new rims had come back from Benny's. After the wheels arrived, I began bolting the last pieces together only to discover that the new replacement bolt that I had bought for the MX2 stem to replace the rusty original was the correct length but the thread did not extend far enough along the bolt for me to be able to tighten it up properly.
A quick order on BMXWorks for yet more parts and I was finished - the night before the show!
 |
 |
 |
 |
 |
 |
 |
 |
||
 |
||||
Knox Show and Shine
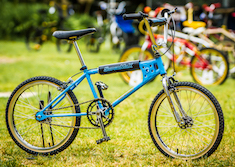
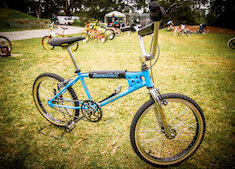
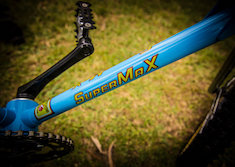
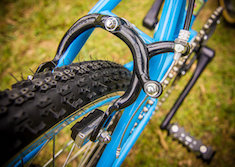
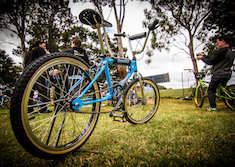
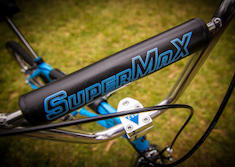
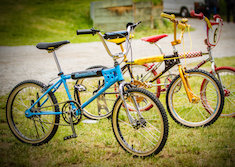
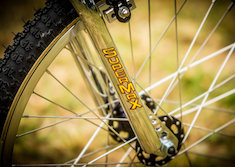
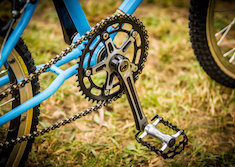
A special thanks to Peter Healey for these pictures taken at the 2015 Knox Show and Shine.
 |
 |
|
 |
 |
|
 |
 |
|
 |
 |
|
 |
 |
|
 |
||


