Programming
Galaga
Galaga is a classic shoot 'em up game that was first written and released by Namco in 1981. This game is the sequel to Galaxian and the prequel to Gaplus (or Galaga 3), Galaga '88 and many others. The game has been ported to numerous systems including the Nintendo Game Boy, 3DS, 64 and Wii; the Sony PlayStation, PlayStation 2, PlayStation 3 and Portable; and the Microsoft Xbox and Xbox 360.
Overview
I have previously tried to build Galaga, my favourite childhood game, using an Arduino and SmartGPU2 shield with little success. Still wanting a version of this game, I decided to build a cocktail cabinet or "table top" version using an old computer and a game emulator.
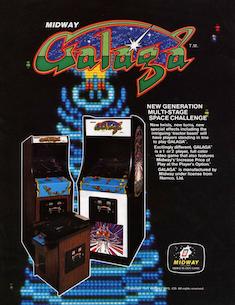
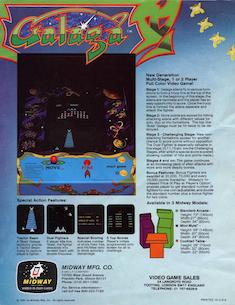
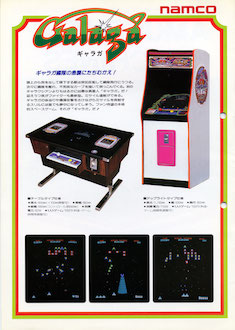
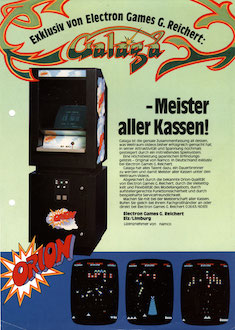
Galaga was a hugely successful game around the world. Below are some original flyers for the United States, Japan and Germany. They show that the game was available in full upright, smaller upright (known as cabaret) or even the cocktail cabinet style (or table top).
 |
 |
 |
 |

Parts List
My aim when building this cabinet was to keep costs to a minimum. With this in mind, my first step was to find a sheet of toughened glass with both rounded corners and rounded edges. Getting one cut to size would have blow the budget before I even started so I found one on eBay for $10. It even came with a horrible, wrought-iron coffee table base which quickly got discarded.
Once the glass was secured, the design of the rest of the cabinet was finalised around its dimensions. The cabinet is 600mm high and was designed this way to take advantage of the pre-cut sizes of MDF.
| Item | Quantity | Price | |
Basic Cabinet | |||
| Sheet of MDF 1200 x 900 x 16mm | 1 | $ 18.16 | |
| Sheet of MDF 1800 x 600 x 16mm | 1 | $ 14.47 | |
| Sheet of MDF 1200 x 600 x 16mm | 1 | $ 12.11 | |
| Treated Pine 70 x 35 x 3600mm | 2 | $ 9.18 | |
| Tasmanian Oak DAR 18 x 18 x 1200mm | 2 | $ 6.32 | |
| Screws 8G x 65mm, Pack of 50 | 1 | $ 7.85 | |
| Screws 6G x 25mm, Pack of 35 | 1 | $ 3.68 | |
| Total : | $ 71.77 | ||
Cabinet Finishing | |||
| Sheet of Toughened Glass 700mm x 700mm | 1 | $ 10.00 | |
| 16mm Red T Moulding (10M) | 1 | $ 31.50 | |
| Self Closing Runner 300mm | 2 | $ 8.65 | |
| Speaker Grill | 2 | $ 10.40 | |
| Black Satin Paint Enamel | 500ml | $ 26.90 | |
| Prepcoat British Paint | 500ml | $ 23.90 | |
| Total : | $ 111.35 | ||
Electronics | |||
| Old Laptop | 1 | $ ?? | |
| Old Monitor 19" | 1 | $ ?? | |
| Small USB Keyboard | 1 | $ 15.00 | |
| Small USB Mouse | 1 | $ 10.00 | |
| Joystick, Buttons and Controller | 2 | $ 92.51 | |
| Joystick Bolts and Nuts | 8 | $ 8.30 | |
| Total : | $ 125.81 | ||
Electronics
As my donor PC was a Windows-based machine, I looked at various compatible emulators including the MAME platform and two Nintendo emulators - Jnes and Project64 which emulate the 8bit Nintendo Entertainment System and the Nintendo 64 respectively. The biggest difference between the MAME platform and the other emulators is that MAME uses the ROMs from original arcade games whereas the other system uses ports from machines designed for home use. Forgetting differences in the game play itself, the MAME games cater for the insertion of coins to start the game and can even flip the screen over to accommodate two player games. Games designed for playing on TVs do not support the flipping of screens and are therefore not really appropriate for table top arcade machines.
The original Galaga ran three separate Zilog Z80 processors - I haven't seen one of these since BITD when I had a CP/M board in my Apple II - so any reasonable, modern computer can out-perform the original even when emulating the environment and all its hardware. I decided to build my machine using an old laptop that had outlived its usefulness. I bought the screen online for $10.50 from a charity in Northcote as it was 4x3 ratio - rather than the modern 16x10 or 16x9 - and more in keeping with the style of the machine I wanted to build.
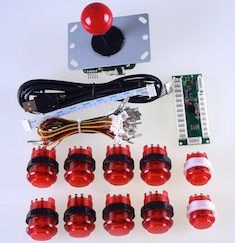
I bought the joystick, buttons and controller on eBay from a company called amye-shop for $52.53 (buy it now) including shipping from China. It arrived so quickly and was such good quality that I bought a second one at auction from the same shop for $39.98! Impatient me. This joystick is arcade quality with a nice tactile click and the works perfectly with the emulators mentioned above.
 |
Cabinet
As I only have a handheld electric saw and a jigsaw at home, I wanted to minimise the number of cuts I would need to make resulting in a easier build and a more professional result. As such, I designed my cabinet to suit the size of the glass top that I bought (700mm x 700mm) and to be 600mm high which happens to be a standard width for MDF sheets.
I bought my timber at Bunnings and they are happy to cut the MDF to size if you have clear instructions for them. The table below shows the how the various sheets were cut to provide me with the four sides, table top and enough scrap timber to fashion the control panel and roller draw.
| MDF Sheet | Cutting Instructions |
MDF 1200 x 900 x 16mm |
1st cut across along length to give : (A) 1200mm x 200mm (scrap) (B) 1200 x 700 boards 2nd cut of sheet (B) to give : (C) 700mm x 700mm (table top) (D) 700mm x 500mm (scrap) |
| MDF 1800 x 600 x 16mm |
Cut across across width to give : (E) 800mm x 600mm (side panel) (F) 800mm x 600mm (side panel) (G) 200mm x 600mm (scrap) |
| MDF 1200 x 600 x 16mm |
Cut across across width to give : (H) 530mm x 600mm (end panel) (I) 530mm x 600mm (end panel) (J) 140mm x 600mm (scrap) |
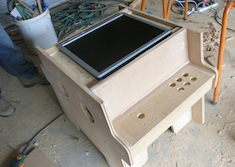
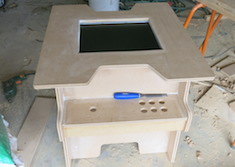
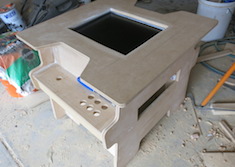
The table top features recesses so that you can see your hands and, more importanlty, the fire buttons through the glass top while playing. The centre hole was measured to fit the screen dimensions and centred both vertically and horizontally. The edges were rolled using a router and a small radius, round bit.
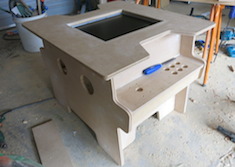
I fashioned the side panels (E & F) to look like Space Invader characters (yes I admit, you have to use your imagination) and cut recesses along the bottom edge for appearances. I mimicked the same recess along the end panels (H & I).
Before assembling the parts, I cut a rebate for the T Moulding using a 2.5mm slot cutter. This can be seen on the edge of the two side panels and the top plate of the control cluster. I elected to use T Moulding as finishing the sawn edge of the MDF is both fiddly and time consuming.
|
|
|

|
|
Assembly
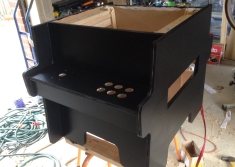
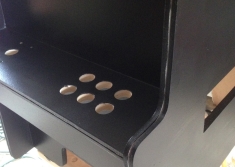
Assembly was pretty straight forward with only a few hiccups. Firstly, the top of the end-boards were visible through the cutouts on the table top. This was simply fixed by leaning them back towards the top of the cabinet. In hindsight, this actually looks better as the end boards are now parallel to the sloping legs of the side-panels.
Secondly, a number of cuts were not quite perpendicular and this became very obvious when fitting the T-moulding as one side fitted perfectly but there other side had a noticeable gap of 1 or 2mm in spots. It turns out that the blade of the jigsaw had been pushed out of the channel in the guide-wheel / bearing and was pushed to the side. This was not obvious when using the jigsaw as it worked normally and
|
|
|

|
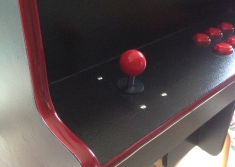
|
Complete (for the moment anyway)
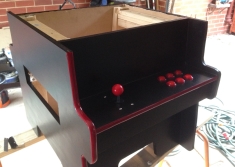
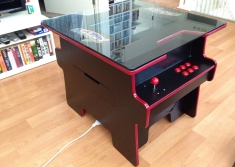
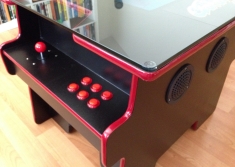
The finished pictures show the machine 'complete' and installed in our upstairs room in time for my son's 10th birthday. I say complete because when these photos were taken the second joystick and buttons had yet to arrive from China. Also, the cabling underneath the controller cluster are all hanging freely and need to be secured as does the internal wiring ..
No speakers have been installed behind the speaker grills yet. In fact, the sound from the PC is quite loud and I am considering not bothering with proper speakers at all. The sound on these old games was not exactly high quality so little is lost when using the little speakers on the laptop for sound.


|
|
|


|
|
How does it Play?
The all important question: how does it play? Well I would love to say great but there are a few things that just aren't right about it .. some can easily be overcome but others I am stuck with.
LCD screens have a relatively narrow viewing angle and outside of this the colours lose all saturation. The natural playing position for this table is right on the edge of this viewing angle resulting in the player wanting to lean further over the screen when playing to see the colours clearly. While this is OK for short gaming sessions, a long session could be tiring.
Obviously, this could be fixed by purchasing a 19" CRT replacement for the LCD screen I am currently using. I am planning on finding one on eBay but will wait until I can find a slimline version with a relatively 'flat' screen. My second concern with a CRT screen is the additional weight it will add ..
Secondly, the table top is a little too low. Although I can sit comfortably in front of it on a stool I have, my knees are right at the same position as the controller cluster - this problem is exasperated by the LCD viewing angle issue described above as I am trying to sit closer to the machine in order to achieve the best picture. Obviously, this issue is hard to fix without drastic surgery on the cabinet. I could put some legs on the bottom but unless I lift it 4 or 5 inches it would not make much difference. Adding this height would make the whole thing look disproportionate and top-heavy so I think I will just put up with it.
Finally, the emulator I am using seems to override the operating system's sleep and hibernate functionality. The unit will nicely go into a sleep mode if the emulator is not running but will not do it when the emulator is running. A little annoying as I would like to leave the machine running and in a state where it can easily be woken from hibernation and played immediately. I am not sure how I am going to address this one ..
Ignoring these issues, the machine plays well! The joystick and buttons have a quality feel about them - much better that I would have though from the measly $90 odd bucks I payed for them.
The ability to swap games quickly is nice as is the ability to swap complete emulators. One moment I can be playing the NES version of Galaga, the next GoldenEye on a Nintendo 64 !


