Cart Builder: Difference between revisions
No edit summary |
|||
| (7 intermediate revisions by the same user not shown) | |||
| Line 5: | Line 5: | ||
Due to the different wiring of the Arduboy FX and Mini [[What is the Arduboy#Arduboy Variants|variants]], there are a number of different URLs that specify the Arduboy variant and the initial cart configuration. These URLs are enumerated below: | Due to the different wiring of the Arduboy FX and Mini [[What is the Arduboy#Arduboy Variants|variants]], there are a number of different URLs that specify the Arduboy variant and the initial cart configuration. These URLs are enumerated below: | ||
=== Arduboy FX === | === Arduboy FX === | ||
| Line 16: | Line 15: | ||
* [https://www.bloggingadeadhorse.com/cart/Cart.html?&file=arduboy-mini.csv&list=arduboy-mini.csv|The Full Enchilada] This cart contains all the games that have been published for the Arduboy Mini. This is also appropriate for any device that uses the PE2/HWB pin for CS on the flash chip. | * [https://www.bloggingadeadhorse.com/cart/Cart.html?&file=arduboy-mini.csv&list=arduboy-mini.csv|The Full Enchilada] This cart contains all the games that have been published for the Arduboy Mini. This is also appropriate for any device that uses the PE2/HWB pin for CS on the flash chip. | ||
== Flashing a Cart to an Arduboy == | == Flashing a Cart to an Arduboy == | ||
| Line 35: | Line 32: | ||
# once the cart has been finalised, click 'Upload' on the presented dialogue. At this point, Chrome will enumerate the USB ports of the device and present a dialogue showing these connections. Select the USB port that the Arduboy is connected to and click 'Connect' | # once the cart has been finalised, click 'Upload' on the presented dialogue. At this point, Chrome will enumerate the USB ports of the device and present a dialogue showing these connections. Select the USB port that the Arduboy is connected to and click 'Connect' | ||
# the cart will be flashed to the Arduboy. Depending on size, this can take a few minutes. | # the cart will be flashed to the Arduboy. Depending on size, this can take a few minutes. | ||
=== Flashing a Cart using the Arduboy Toolset === | === Flashing a Cart using the Arduboy Toolset === | ||
| Line 50: | Line 46: | ||
# the Arduboy Toolset should indicate that it has detected your Arduboy. If not, turn the device off and back on again so that id at the Arduboy bootloader screen. | # the Arduboy Toolset should indicate that it has detected your Arduboy. If not, turn the device off and back on again so that id at the Arduboy bootloader screen. | ||
# click the 'Open File' button and select the newly created <code>.bin</code> file then click 'Upload' to flash the cart image to the Arduboy device. | # click the 'Open File' button and select the newly created <code>.bin</code> file then click 'Upload' to flash the cart image to the Arduboy device. | ||
=== Flashing a Cart using the Python Scripts === | === Flashing a Cart using the Python Scripts === | ||
| Line 66: | Line 61: | ||
# install Pillow For Windows, run <code>python -m pip install pillow</code> from command line. For OSX, run <code>easy_install pillow</code> from a terminal window. | # install Pillow For Windows, run <code>python -m pip install pillow</code> from command line. For OSX, run <code>easy_install pillow</code> from a terminal window. | ||
# download Mr.Blinky's Python Utilities from the GitHub repository [https://github.com/MrBlinky/Arduboy-Python-Utilities/archive/refs/heads/master.zip here]. This is a zip file and can be expanded into a convenient directory. | # download Mr.Blinky's Python Utilities from the GitHub repository [https://github.com/MrBlinky/Arduboy-Python-Utilities/archive/refs/heads/master.zip here]. This is a zip file and can be expanded into a convenient directory. | ||
==== Process ==== | ==== Process ==== | ||
| Line 74: | Line 68: | ||
# the website will generate a cart for you based on the selections you have made and download it as a <code>.bin</code> file into your downloads directory. This may take up to a few minutes depending on the number of games included in the cart. | # the website will generate a cart for you based on the selections you have made and download it as a <code>.bin</code> file into your downloads directory. This may take up to a few minutes depending on the number of games included in the cart. | ||
# open a command window and navigate to the directory where the Python Utilities were expanded to. Run the command <code>python flashcart-writer.py {path to bin file}/flashcart-image.bin</code> | # open a command window and navigate to the directory where the Python Utilities were expanded to. Run the command <code>python flashcart-writer.py {path to bin file}/flashcart-image.bin</code> | ||
== Adding a Game to the Cart == | == Adding a Game to the Cart == | ||
| Line 103: | Line 96: | ||
** send a PM via the forum to user @filmote to indicate that you have uploaded a game. The game is not made publicly visible automatically and are approved manually. | ** send a PM via the forum to user @filmote to indicate that you have uploaded a game. The game is not made publicly visible automatically and are approved manually. | ||
** only the author of the game should do this as games are published only with the author's permission. | ** only the author of the game should do this as games are published only with the author's permission. | ||
=== Adding a Game to the Cart using an .arduboy file === | === Adding a Game to the Cart using an .arduboy file === | ||
| Line 118: | Line 110: | ||
# click 'Upload' to complete. | # click 'Upload' to complete. | ||
== Category Maintenance == | |||
The Cart Builder allows you to add, delete and rearrange categories. | |||
== | === Rearranging Categories === | ||
[[File:CartBuilder_DeleteCategory.gif|thumb]] | |||
# categories can be moved one column to the left or right by clicking [[File:ArrowLeft.png]] or [[File:ArrowRight.png]] icons under the category image. | |||
# categories can be moved to the far left or far right by clicking [[File:ArrowLeftMost.png]] or [[File:ArrowRightMost.png]] icons under the category image. | |||
=== Deleting Categories === | |||
# categories can be deleted by clicking the [[File:Delete.png]] icon under the category image. Any existing games in that category will be moved to the left hand side of the page allowing you to add them to other categories. | |||
=== Creating a new Category === | === Creating a new Category === | ||
| Line 141: | Line 145: | ||
# drag and drop the newly created category image on top of the existing category image to replace the image. | # drag and drop the newly created category image on top of the existing category image to replace the image. | ||
== Saving and Restoring a Cart == | |||
[[File:CartBuilder SaveRestoreCSV.png|thumb]] | |||
The Cart Builder allows the user to save and restore a custom cart using the <code>Download CSV</code> and <code>Upload CSV</code> options, respectively. | |||
The downloaded CSV file will be stored locally on the users machine in a CSV format compliant with the [[Flashcart Format|Flashcard Format]] used by Mr.Blinky's Python utilities and other tools. | |||
The Cart Buildersite will retain any games uploaded and custom category headings within its temporary file system. However this is not guaranteed as (eventually) the filesystem on the hosted website may fill and need purging. This will be done and an FIFO basis as it will be assumed that the oldest items are least likely to be recalled. | |||
Latest revision as of 10:18, 1 July 2024
The Cart Builder is a website that allows you update an Arduboy FX or Arduboy Mini variant with the latest games contributed by the community. There are a number of existing cart definitions ranging from the 'Full Enchilada' - which contains all games available - to speciality carts including Filmote's curated list of games, a Press Play on Tape fan cart and others.
The site also allows you to contribute games and to create your own cart with custom categories, etc. Contributed games can be made available to the community or kept hidden and only available to the contributor.
Due to the different wiring of the Arduboy FX and Mini variants, there are a number of different URLs that specify the Arduboy variant and the initial cart configuration. These URLs are enumerated below:
Arduboy FX
- The Whole Enchilada This cart contains all the games that have been published for the Arduboy FX.
- Filmotes Curated List This cart is a selection of games that curated by Filmote, the site's owner. The intent is to keep the list to approximately 100 - 125 titles.
- PPOT Flash Cart This cart contains all Filmotes's & PPOT games in one collection.
Arduboy Mini
- Full Enchilada This cart contains all the games that have been published for the Arduboy Mini. This is also appropriate for any device that uses the PE2/HWB pin for CS on the flash chip.
Flashing a Cart to an Arduboy
Most users will simply want to flash the entire cart to their Arduboy periodically. When using a recent version of Google Chrome, this can be done directly from the site. When using other browsers, there are additional steps and software involved.
Flashing a Cart using Chrome / WebSerial
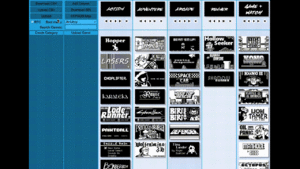
Uploading a cart using Google Chrome is the easiest way to update an Arduboy. It uses a new technology, called WebSerial, which is not available in other browsers at time of writing. Before using, ensure that your instance of Chrome is up to date.
- navigate to the Cart Builder website using the appropriate link above.
- ensure your Arduboy is plugged in and powered on.
- click the 'Upload' button in the top-left corner of the website.
- the website will generate a cart for you based on the selections you have made. This may take up to a few minutes depending on the number of games included in the cart.
- once the cart has been finalised, click 'Upload' on the presented dialogue. At this point, Chrome will enumerate the USB ports of the device and present a dialogue showing these connections. Select the USB port that the Arduboy is connected to and click 'Connect'
- the cart will be flashed to the Arduboy. Depending on size, this can take a few minutes.
Flashing a Cart using the Arduboy Toolset
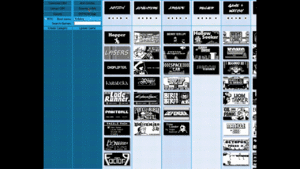
Uploading a cart using the Arduboy Toolset can be achieved following the steps below.
- navigate to the Cart Builder website using the appropriate link above.
- ensure your Arduboy is plugged in and powered on.
- click the 'Download Bin' button in the top-left corner of the website.
- the website will generate a cart for you based on the selections you have made and download it as a
.binfile into your downloads directory. This may take up to a few minutes depending on the number of games included in the cart. - open the Arduboy Toolset and select the 'Flashcart' tab.
- the Arduboy Toolset should indicate that it has detected your Arduboy. If not, turn the device off and back on again so that id at the Arduboy bootloader screen.
- click the 'Open File' button and select the newly created
.binfile then click 'Upload' to flash the cart image to the Arduboy device.
Flashing a Cart using the Python Scripts
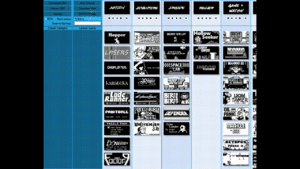
Uploading a cart using the Python Scripts can be achieved following the steps below.
Prerequisites
Before attempting to flash a cart, you will need to install Python and some additional libraries:
- install Python 3 Download and install Python 3 from the download website. When installing on Windows, check option 'Add python.exe to path' when installing)
- install PySerial For Windows, run
python -m pip install pyserialfrom command line. For OSX, runeasy_install pyserialfrom a terminal window. - install Pillow For Windows, run
python -m pip install pillowfrom command line. For OSX, runeasy_install pillowfrom a terminal window. - download Mr.Blinky's Python Utilities from the GitHub repository here. This is a zip file and can be expanded into a convenient directory.
Process
- navigate to the Cart Builder website using the appropriate link above.
- ensure your Arduboy is plugged in and powered on.
- click the 'Download Bin' button in the top-left corner of the website.
- the website will generate a cart for you based on the selections you have made and download it as a
.binfile into your downloads directory. This may take up to a few minutes depending on the number of games included in the cart. - open a command window and navigate to the directory where the Python Utilities were expanded to. Run the command
python flashcart-writer.py {path to bin file}/flashcart-image.bin
Adding a Game to the Cart
Adding a Game to the Cart using Individual Files
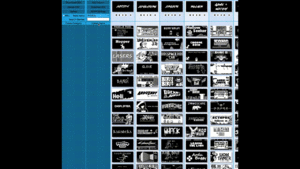
New games can be added to the cart to share with the community or to include on your own bespoke cart.
To upload a game, you must include a .hex file and a 128 x 64 pixel, black and white .png file for display in the bootloader menu. Optionally, the game might have one or two .bin files that store additional graphics or other assets and to save program data. These will typically be named {gameName}-data.bin and {gameName}-save.bin respectively.
To add a game:
- click 'upload Game' in the top-left corner of the website. This will reveal the 'Upload an Existing Game' dialogue.
- enter a title, version, developer name and description in the top fields. Do not include special characters in these fields.
- click 'Browse' adjacent to the 'Hex File' label. Locate and select the game's
.hexfile. - click 'Browse' adjacent to the 'PNG File' label. Locate and select the game's
.pngfile. - optionally, click 'Browse' adjacent to the 'Data File' label. Locate and select the game's data file - this will typically be denoted with a filename that contains the suffix '-data.bin'.
- optionally, click 'Browse' adjacent to the 'Save File' label. Locate and select the game's save file - this will typically be denoted with a filename that contains the suffix '-save.bin'.
- if the game uses the EEPROM, check the 'Game uses EEPROM' option and specify the details including the start and end range and whether or not the EEPROM is protected by some hash algorithm to prevent overwriting.
- check the 'Share with the community' option if you want to share the game with the community.
- click 'Upload' to complete.
Notes:
- the EEPROM usage details is only important when sharing with the community and can be ignored for games not being shared.
- when sharing a game with the community:
- send a PM via the forum to user @filmote to indicate that you have uploaded a game. The game is not made publicly visible automatically and are approved manually.
- only the author of the game should do this as games are published only with the author's permission.
Adding a Game to the Cart using an .arduboy file
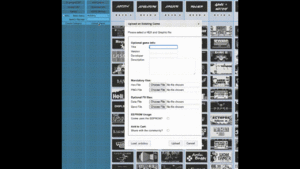
The .arduboy format is an archive file that contains the program's main .hex file, any supporting .bin files and graphics in a single package for convenience. A .json file is also included and this details the files within the package and some additional metadata fields including the author, version numbers and other details. The Cart Builder website can interrogate this detail and pre-populate the upload fields automatically.
To add a game:
- click 'Upload Game' in the top-left corner of the website. This will reveal the 'Upload an Existing Game' dialogue.
- click the 'Load .arduboy' button in the lower-left corner of the dialogue. Locate and select the game's
.arduboyfile. - fill in any missing fields as per the #Adding a Game to the Cart using Individual Files section above.
- click 'Upload' to complete.
Category Maintenance
The Cart Builder allows you to add, delete and rearrange categories.
Rearranging Categories
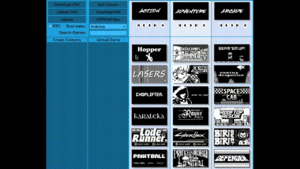
- categories can be moved one column to the left or right by clicking
 or
or  icons under the category image.
 - categories can be moved to the far left or far right by clicking
 or
or  icons under the category image.
Deleting Categories
- categories can be deleted by clicking the
 icon under the category image. Any existing games in that category will be moved to the left hand side of the page allowing you to add them to other categories.
Creating a new Category
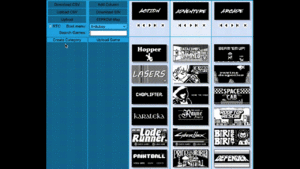
New categories can be create and added to the cart easily.
To add a category image:
- click 'Create Category' in the top-left corner of the website. This will reveal the 'Create new Category' dialogue.
- enter a category name and press the 'Create' button to create the category image.
To create a new category in the cart:
- click the 'Add Column' button in the top-left corner of the website. This will create a new column in the first position of the cart.
- drag and drop the newly created category image on top of the '?' image to replace the image.
- drag and drop games into the category.
To replace an existing category name:
- drag and drop the newly created category image on top of the existing category image to replace the image.
Saving and Restoring a Cart
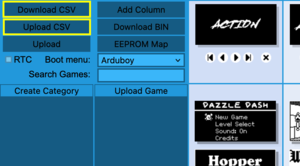
The Cart Builder allows the user to save and restore a custom cart using the Download CSV and Upload CSV options, respectively.
The downloaded CSV file will be stored locally on the users machine in a CSV format compliant with the Flashcard Format used by Mr.Blinky's Python utilities and other tools.
The Cart Buildersite will retain any games uploaded and custom category headings within its temporary file system. However this is not guaranteed as (eventually) the filesystem on the hosted website may fill and need purging. This will be done and an FIFO basis as it will be assumed that the oldest items are least likely to be recalled.